Map Surge PRO Software Step-by-Step Instructions
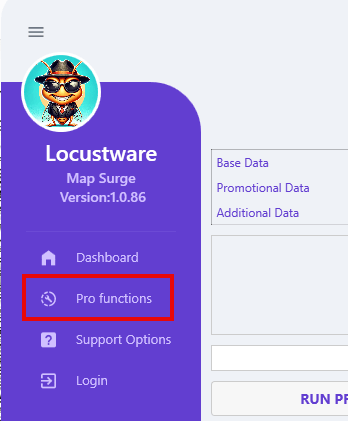
PRO Dashboard:
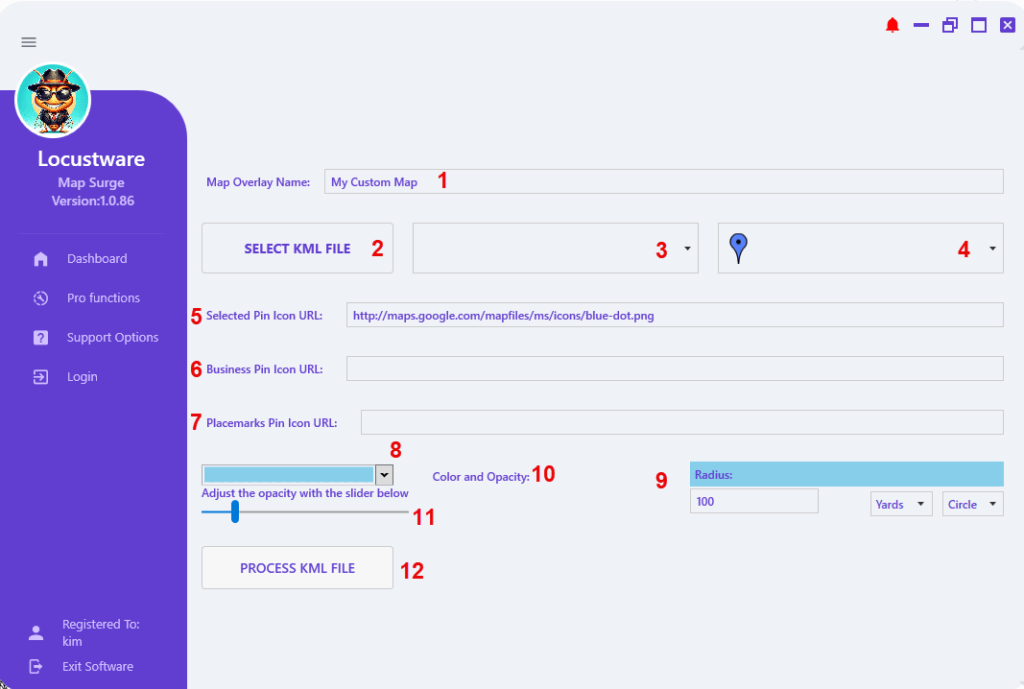
STEP 1
Image #2

First you want to load the KML file that contains the map layer you are wanting to customize.
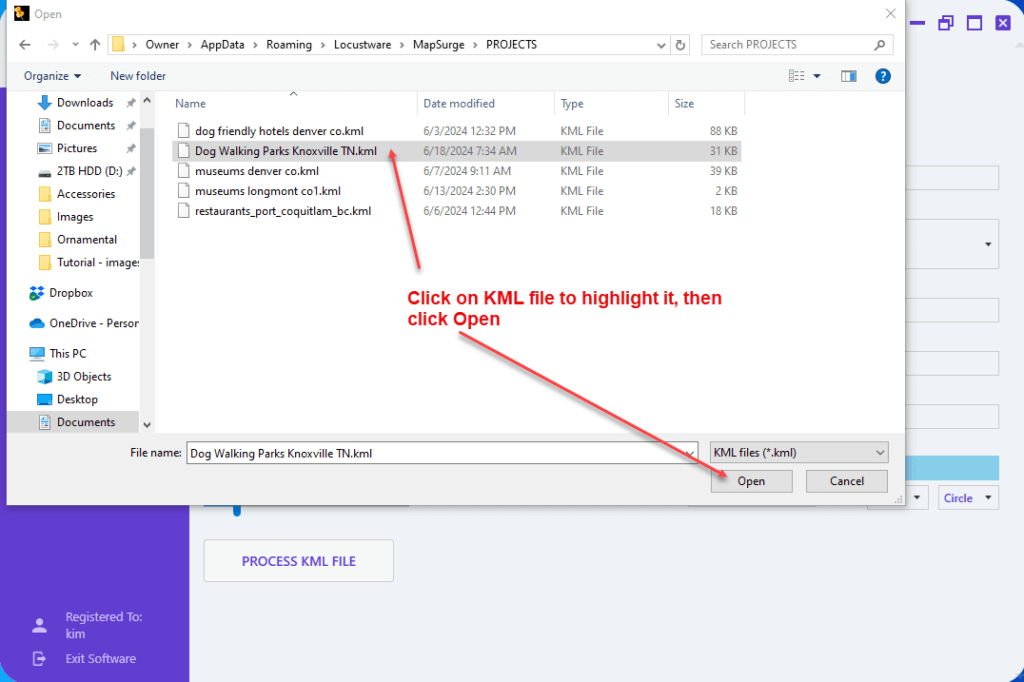
When you click the SELECT KML FILE button a window will open, then navigate to where you have your KML file, click on it to highlight it and then click Open in bottom right-hand corner.
STEP 2:
Image #1
Customize your map layer title. Choose an optimized name for your Map Overlay Name.
Hint: what words would people search for with respect to the pins on the map layer you have created.

This is your map layer title:
STEP 3:
Image #3
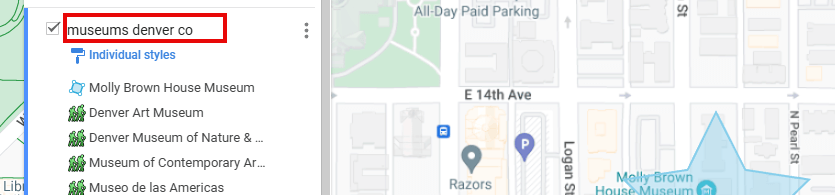
Click the arrow for the dropdown where you will click on the business or locations you want to target. This is the business or location that you will be creating the special features for.

STEP 4:
Image #4, 5
Click on the arrow and choose a pin icon from the dropdown. That icon’s URL will then show up in the Selected Pin Icon URL field.
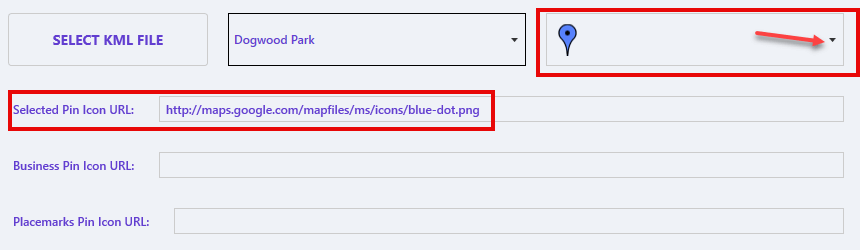
TIP: If you have your own maps pin icon that you want to use instead, you can use that pins icon URL It must be on a web page where you can enter a URL to access it.
STEP 5:
Image #6
Copy the URL of the map icon pin you want to use for the business or location #5 you are targeting and paste it into the Business Pin Icon URL field #6. When you do this only your targeted business you chose in #3 will have that pin.

TIP: Want more than one business to have a special pin on your map layer?
Go back to the dropdown menu #3 and choose the next business or location from the list and follow STEP 5 again.
** Make sure that the Placemark Pin Url is blank when doing this step 5.
STEP 6:
Image #7, 4, 5
For all the rest of the pins on your map you will choose an icon from the pin icons dropdown #4. You will then see it in the Selected Pin Icon URL #5. Copy and paste that URL into the Placemarks Pin Icon URL #7.
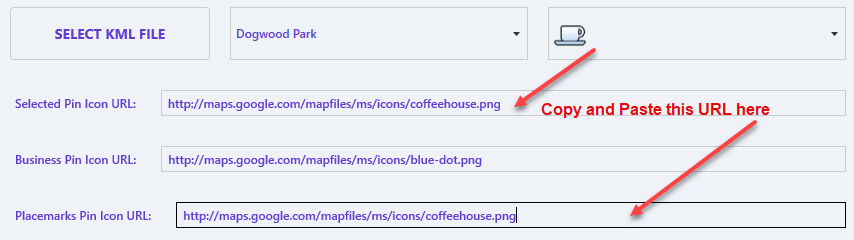
TIP: If you have your own maps pin icon that you want to use instead, you can use that pins icon URL. It must be on a web page where you can enter a URL to access it.
STEP 7:
Image #8, 9, 10, 11
If you want to highlight your targeted business, follow these next steps.
** You cannot choose an icon for this step, so you need to leave the Business Pin Icon URL field #6 blank. This feature uses the icon that Google already has there.
Under Radius #9 click the dropdown to choose the distance metrics you want to use. Then select the distance you want that metric to go out from your targeted business/location.

Then choose the shape you want that radius to be.

Now from the dropdown #8 choose the color you want your radius shape to be. Next step is to move the slider #11 to get the level of opacity you want for your shape. When you do this the shape will show up #10 and you can see the opacity levels as you move the slider.
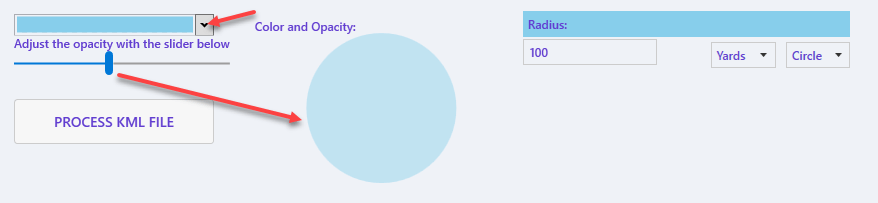
TIP: the more transparent you make it the better you will be able to see the pin because this overlays on top of the pin.
STEP 8:
Image #12
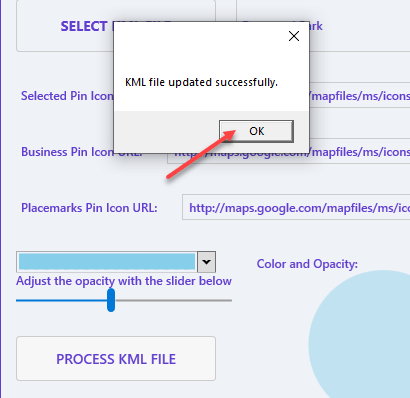
Now you’re ready to click the PROCESS KML FILE button #12.

After you click the PROCESS KML FILE button will see a little popup window that says “KML file updated successfully”. Click OK and your map is ready for you to load it up to your mymaps account.
TIP: When you upload a map to your mymaps account, it is still not visible to the world until you go through the publishing steps. You can leave it unpublished if you want to experiment with creating the maps and get used to it because you can delete the map layers. Only set to Publish and Share when you are ready for everyone to see your map.
TIP: make sure you use your country’s Google address when accessing your mymaps account and uploading your maps.
Ex.
U.S. – google.com
UK – google.co.uk