Map Surge Software Step-by-Step Instructions
Dashboard:
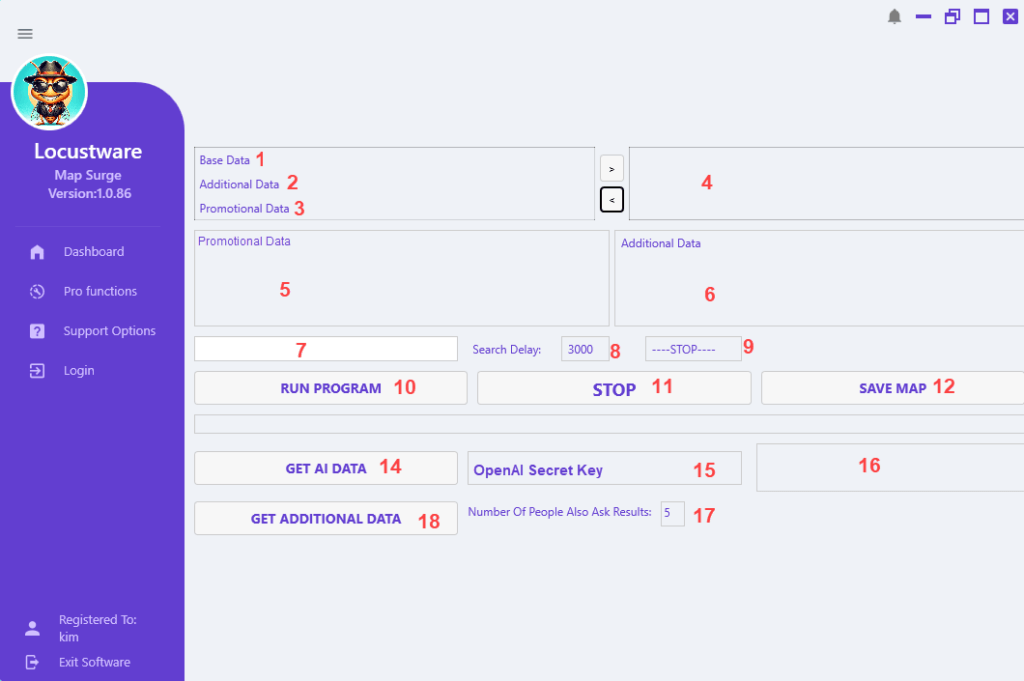
STEP 1:
Image #1, 2, 3, 4
Select the data set that you want to put in your pins by clicking on it. This will highlight it. You then click the arrow to move it to the box on the right.

This is what it will look like once you click that arrow.

You can choose all 3 data sets if you want to or just one, it’s up to you. If you decide you don’t want a data set after all then do those steps in reverse. Click on the data set in the right box to highlight it and click the arrow that’s pointing to the left and it will move it back to the left box and will not be included in your pins.
You can also change the order of the data that you want shown in your pin. If you want your Promotional data to show after the basic data, click on it and send it to the right box and then click the Additional Data and send it over to the right box.
If there is a data set you do not want in your pins then do not send it to the right side box.
STEP 2:
Image #7, 8

Enter your search term and location you want your map to be built around.
Search delay is measured in milliseconds. If Google is not bringing you back the listings you think it should be you can increase that number and run project again. Ex. Increase to 4000 or 5000. Usually if Google is playing nice then it will work well at its default – 3000.
** If you are adding Promotional Data or Additional Data – DO NOT click Run Program until you are finished adding the rest of the steps.
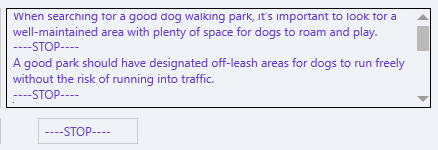
STEP 3:
Image #5
If you want to use the Promotional Data, you want to do that next.

In the image you see an example of what someone might enter. What you enter may depend on if you are a local marketer or an affiliate marketer.
STEP 4:
Image #6, 14, 15, 16
If you are using Additional Data you need to do this before you click Run Project.


#15 – Enter your openAI secret key.
#16 – Enter your prompt for the content you want created and added to your pins.
#14 – Click Get AI Data button. When the AI data has been created you will see it in the Additional Data box #6.
In the example above you see this prompt entered “give 10 sentences about …..”. Map surge will then take those sentences that AI created and put them into the Additional Data box.

You will notice that the content/data is in one big paragraph. So, we need to separate those sentences (or however much content you want to use in each pin) using the code —-STOP—- to divide those sentences up to be distributed throughout the pins. You can copy and paste this code from the box you see that is right below the Additional data box.
10 is just an example, if you think you will have a lot of pins you will want to have more content to divide among your pins.
STEP 5:
Image #6, 17, 18

If you want to use Google’s People Also Ask, choose the number of results/questions you want MapSurge to bring you back. Now click Get Additional Data button.
This content will also be in the Additional Data box #6. Map Surge will then divide that up among the pins that are created.
TIP: Google doesn’t always have the People Also Ask questions for every search. If you don’t get any questions back, remove the location from your search term and try again. Also words like “best” do not work too well with People Also Ask searches.
If you do remove the location from the search term make sure you replace it now before moving onto this next step.
STEP 6:
Image #10, 11

Now click RUN PROGRAM button. You will know Map Surge is doing its magic by the moving colored circles in the bottom right on the dashboard.
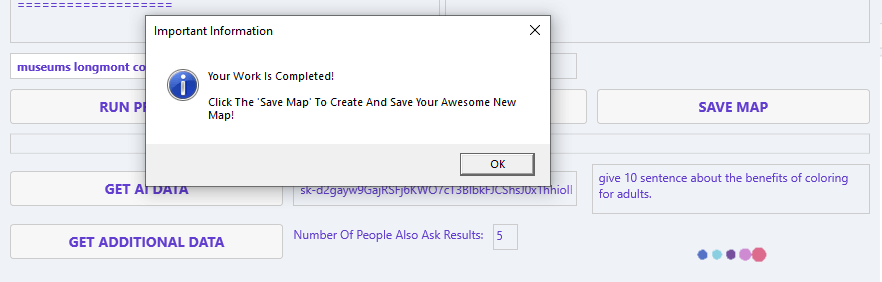
STEP 7:
Image #12
When your project is complete you will see a message pop up that will tell you to click the SAVE MAP button. Click OK on the message pop up and then click the SAVE MAP button on your dashboard.
When you click the SAVE MAP button a window will open for you to save the map in the location of your choice.
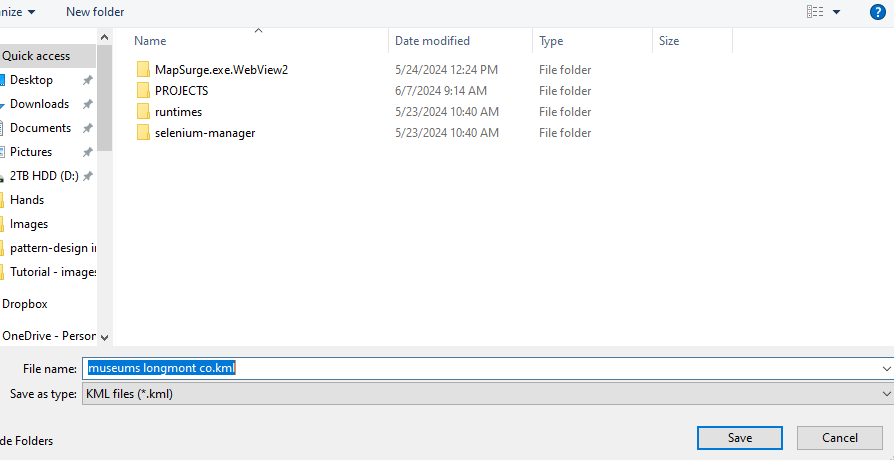
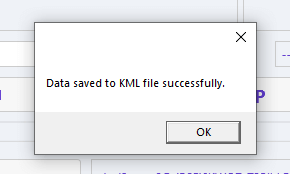
After you click save that window will close and you will see a message on the dashboard that says Data saved to KML file successfully.
This saved KML file is what you will be customizing with the Pro version.