Entering the Data
Using the software is simplicity itself.
Once you have collected all the information you need to create an OTP Project, start up the software and the interface will be like the following:
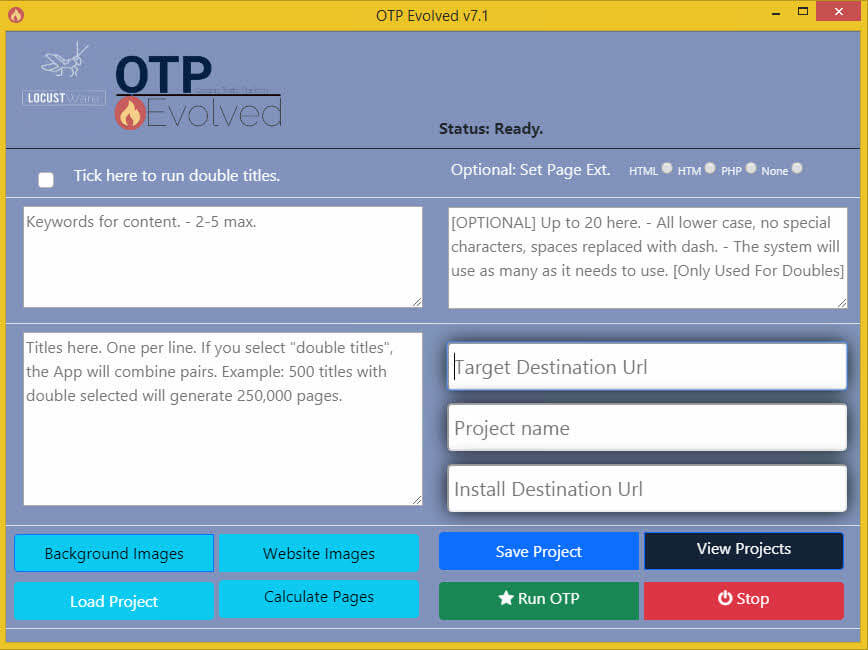
Now simply copy and paste most of the information that you collected in the research phase and put it in the appropriate fields.
When adding a Project Name, try to name them so that they include the domain that you are using. This way, you will be able to find all the projects that you create for a specific domain easily.
ALL PROJECT NAMES SHOULD NOT INCLUDE SPACES.
For the images, you will need to click the appropriate button in the bottom left and when the selection window opens up, navigate to the folder with your images and select the images you want.
Once you have all the data entered, it’s always safest to click the Save button.
At this point you are ready to click the Run OTP button to generate all the files.
If while OTP is running you realize that you made a mistake, click the Stop button to halt operation.
Loading A Previous Project
There are times when you need to re-run a project or use a previous project for a template. Click the Load Project button and select the appropriate project. All the data from that project will load. Make any changes you would like to make. Unless you are replacing this project on your OTP Site, it’s a good idea to change the Project name so you don’t overwrite it.
Viewing the OTP Project Files
You will always need to access your files to either edit them or upload them to your hosting account. You can access these files from the software interface by clicking the View Projects button. This will open a dialog with the choices View and Verify. Click View and the files will now be shown to you in Windows File Manager.
Verifying the OTP Project Files
To make sure that your OTP Project has all the files that it should have, Click the View Projects button and then select Verify. You will then receive a message that it passed or failed.
Test Each Project You Create
Although very simple to create, OTP Projects are actually very complex in their functionality. So once you have uploaded an OTP project, it is always best to test the url to the folder you uploaded the files to and also one of the pages. You also need to remember that not everyone will have the same resolution monitor you do or have the browser open to the same size. So resize the browser to varying widths to see how your pages will adjust on different size screens. Don’t forget to shrink right down to the size of a mobile phone to make sure that everything on the overlay is viewable.